 The table is finished and I couldn't be happier!
I have to say...my husband is the man!
I ask for him to build for me, and he says "no". Time passes and I ask again, and he says "no". But, then...then...
after a little while longer, I ask one more time...
and he always (eventually) says "yes"!
;)
It works every time, and I'm telling you, he delivers!
I thought he would just glue together some 2 x 6's, clamp 'em up, rub on some stain and poly and call it good. How hard could building a plank style table top really be anyway? For him, not hard at all.
But he did so much more than just glue together some boards, and it definitely shows in the final product.
Here is where I left off on my last post...
 After milling up the 2 x 6's so that they fit together perfectly, then mitering just the right amount of "groove" between the boards, he clamped them together and I patiently (or maybe not so patiently) waited over night for them to dry.
The first thing that needed to happen the next day was sanding the top so that it would be smooth. We didn't want to end up with wobbly plates and glasses perched on the table top. Sanding is always a boring, but necessary step for the girl that cannot wait to see how it's all going to turn out.
Except, he didn't sand it.
He went old school.
He got out his grandfather's planer and smoothed the entire table top
by hand...
 M-hmm. Told you he was the man.
*love*
It took quite a bit longer than it would have with the palm sander, but it was so worth the wait.
 We decided to go with Kona Stain. Our old kitchen table top was always at odds with the color that our circa 1995 kitchen cabinets have become (think orange oak), so we figured dark Kona was the best way to go...
 It creates a perfect contrast between the stripes of the grain.
But my favorite parts are the spots where the hand planer skipped. They show up perfectly...
 Finally it was time to start in with the polyurethane to seal it all up...
 The weather here has been pretty darn cold, which has meant drying times that take way, way longer than we are used to...
 We put on a total of four coats of poly. We felt good at three, but figured a fourth coat certainly couldn't hurt...
 The new table top was attached to the table base the exact same way that the old one had been attached. Just a few screws from underneath the table...
 I am so happy with it!
Here's a little side-by-side comparison...
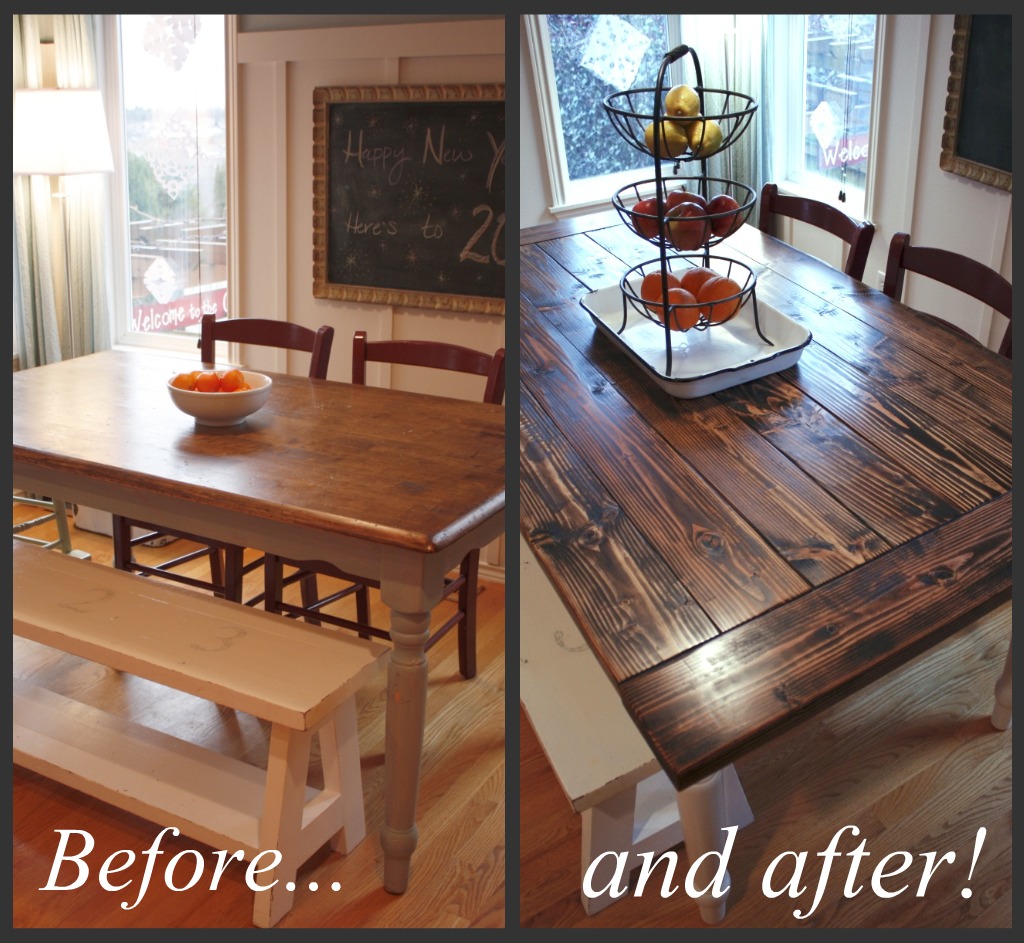
I love a piece with some good ole' hand built character,
and this table has got it!
The only out of pocket cost for us was the purchase of eight 2 x 6's. The total was less than $40.00.
We also took liberties with the dimensions of the new table top. Starting from scratch meant that we got to do it our way. We made the overall dimensions larger than the original table had been - an inch wider on each side, and seven inches longer in length. It was a minor change that has made a big difference during dinner when we're all sitting down at the table together. A little more room for all of those plates, glasses and utensils to spread out.
So almost a year after finding my inspiration, I finally have my Farmhouse Table.
Thanks to my rockstar carpenter!
XO
Now...to do something about that I'm-not-quite-sure-what's-going-on-back-there-but-it's-definitely-looking-forgotten-and-neglected wall...

Off to shop the house for a new look!

P.S. I am linking this post to:
Between Naps On The Porch, The DIY Show Off, The Trendy Treehouse, Today's Creative Blog, Blue Cricket Design, The Shabby Nest, Beyond The Picket Fence, Somewhat Simple, Fireflies and Jellybeans, The Shabby Chic Cottage, Remodelaholic, Tatertots and Jello, Funky Junk Interiors,

We also took liberties with the dimensions of the new table top. Starting from scratch meant that we got to do it our way. We made the overall dimensions larger than the original table had been - an inch wider on each side, and seven inches longer in length. It was a minor change that has made a big difference during dinner when we're all sitting down at the table together. A little more room for all of those plates, glasses and utensils to spread out.
So almost a year after finding my inspiration, I finally have my Farmhouse Table.
Thanks to my rockstar carpenter!
XO
Now...to do something about that I'm-not-quite-sure-what's-going-on-back-there-but-it's-definitely-looking-forgotten-and-neglected wall...

Off to shop the house for a new look!
P.S. I am linking this post to:
Between Naps On The Porch, The DIY Show Off, The Trendy Treehouse, Today's Creative Blog, Blue Cricket Design, The Shabby Nest, Beyond The Picket Fence, Somewhat Simple, Fireflies and Jellybeans, The Shabby Chic Cottage, Remodelaholic, Tatertots and Jello, Funky Junk Interiors,
